


")


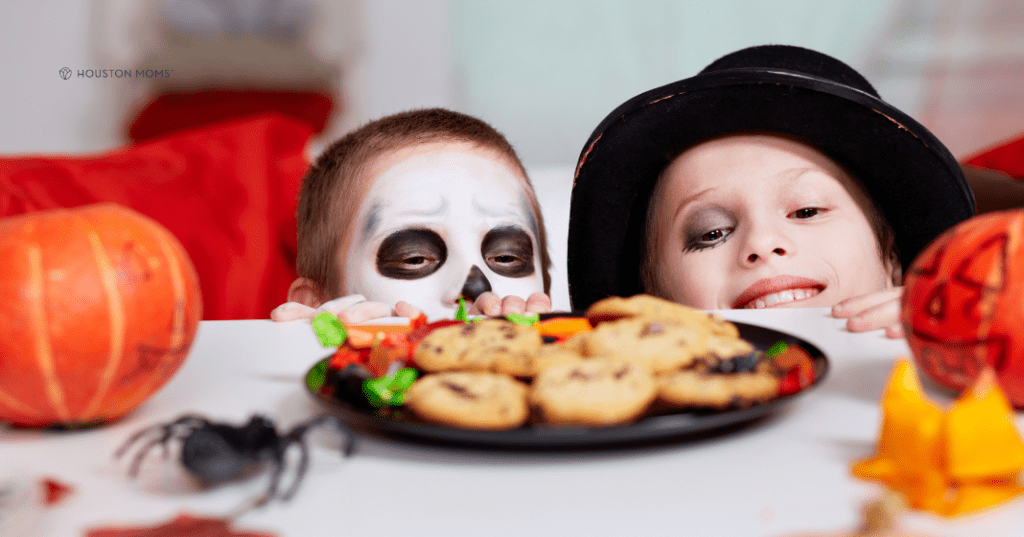
I’m not sure about you, but the ‘ers came fast this year for me! Here we are in October, and I’m scrambling to find some quick treats for spooky season to feed the monsters in this house! Whether you celebrate Halloween or not, there’s no denying that the food associated with the holiday is just yummy and not to be taken too seriously. Below, I’ve collected our top 10 recipes for the Halloween season, and the best part is that they will take you under 20 minutes tops!
 Spider Sandies
Are you trying to find some easy, scary treats for spooky season that can serve as an afternoon snack? Look no further! These are tasty enough to keep hungry eaters satisfied (at least until dinner!)
Ingredients
2 White/wheat bread slices
1 tbsp creamy peanut butter
1 tbsp grape jelly ( or your choice of jelly)
8 Thin pretzel stick
2 Candy eyeballs
Instructions
1. Using the lid of a round glass cup, carve out rounds into two slices of bread
2. Spread an even layer of peanut butter across one of the bread rounds
3. Spread an even layer of jelly across the other side of the bread round
4. Place 4 pretzel sticks on each side, creating the spider legs.
5. Combine the two rounds, covering the pretzel’s legs.
6. Add a tiny dot of peanut butter to the back of the two candy eyes to help them stick. Stick them onto the top layer of your peanut butter and jelly spider sandwich, creating the spider eyes.
Dirt Pudding
Another great activity for the kids is this treat, which is no bake! With few ingredients, each kid can still express creativity by designing their own, with as much dirt and worms as they would like!
Ingredients
2 Cups cold milk
1 (3.9-ounce) package of instant chocolate pudding (4 serving size)
8 ounces frozen whipped topping, thawed
1 1/2 cups crushed chocolate sandwich cookies (about 16), divided
20 Gummy worms
Instructions
1. Whisk together milk and instant pudding for 2 minutes until the pudding is completely dissolved. Let stand for 5 minutes to thicken
2. Stir in frozen whipped topping and 1/2 cup of crushed cookies
3. Spoon into 10 individual cups
4. Sprinkle the remaining crushed cookies over the pudding mixture
5. Top each cup with 2 gummy worms
6. Chill for at least 60 minutes or until ready to serve
Orange Mini Pumpkins
There is no real prep work for these treats for spooky season, and they are perfect for classes, sports teams, or trunk-or-treat events. Great to hand out for a Halloween party or as a pre-Trick or Treat snack. And the kids will love helping you make them!
The oranges are ok to leave at room temperature (or pack into a lunch) for 5-6 hours, but after that, they’ll dry out without their peel!
Ingredients
12 Mandarin Oranges
12 green Tic-Tacs / or Mike and Ike candy/ anything green you can make to look like a small stem
Instructions
1. Peel mandarin orange
2. Place ‘stem’ inside top
Candy Corn Marshmallows
This dessert is a great way to celebrate the season’s beautiful colors. You can make these with orange and yellows or even green and purples to give a Halloween feel. They are easy to make and have few ingredients, so they’re inexpensive. Win-win!
Ingredients
1 10 oz bag of regular marshmallows
12 cake pop sticks
1 10 oz bag of white candy melts
*Red and yellow (or orange and yellow or purple and green) coloring
Edible googly eyes
A baking sheet covered with parchment or wax paper
Instructions
1. Poke a stick on the flat side of each marshmallow.
2. Follow the package instructions to melt the candy. Separate into 3 bowls, 1 for each color and 1 to leave untinted.
3. Follow the food coloring instructions to tint one bowl orange and one yellow.
4. Dip marshmallows first in orange candy, going about 2/3 of the way up. Place on the baking sheet to set. Wait until completely cooled.
5. Then dip the bottom third in yellow candy and return to the baking sheet to set. Wait until completely cooled.
6. Dip the backs of the googly eyes in the untinted candy and stick them on the marshmallows. Wait until complexly cooled.
Candy Corn Waffles
A sweet breakfast treat made to look like the famous candy! Some of us love them, and some don’t, but they look iconic. These candy corn waffles have no candy corn in the recipe, but the whole family will want more!
Ingredients
2 cups all-purpose flour
2 tablespoons granulated sugar
4 teaspoons baking powder
Pinch of kosher salt
2 large eggs
1 1/2 cups whole milk
1/2 teaspoon vanilla
5 tablespoons shortening
4 tablespoons butter
Yellow food coloring
Orange food coloring
White candy melts
Instructions
1. Whisk 2 cups flour, 2 tablespoons sugar, 4 teaspoons baking powder, and 1 teaspoon salt in a large bowl.
2. Whisk in 2 eggs, 1 1/2 cups milk, 5 tablespoons melted shortening, and 4 tablespoons melted butter.
3. Tint half the batter orange and half yellow with food coloring.
4. Preheat a round waffle iron to the lowest setting.
5. Spoon some orange batter into the middle and some yellow batter around it. Cook until just crisp.
6. Separate into triangles and dip the tips in melted white chocolate.
Ghost Sandwiches
I’m not trying to reinvent the wheel over here, but I think that’s the point: to put our spin on treats for spooky season, right? Putting a spooky flare on these lunch boxes can spice up lunch boxes and snacks at home for the festive season.
Ingredients
Peanut butter
Preferred jelly
Raisins for eyes
Ghost cookie cutter
Instructions
1. Use the cookie cutter to make ghost shapes on bread
2. Spread the bottom piece of bread with a layer of peanut butter.
3. Add the jelly and place the remaining bread on top.
4. Attach the raisins to make the ghost’s eyes by adding a bit of peanut butter.
Halloween Mix
This type of recipe has always been a big hit in our house. We take the boys’ favorite snacks and put them in a bowl to make their fun mixes. So, try using some holiday classics to put a fun and scary spin on the recipe!
Ingredients
3 Cups Honey Nut Chex Mix
2 Cups Bugles Snacks
2 Cups Pretzels
1 Cup Candy Corn
1 Cup Chocolate Covered Peanuts
1 Cup Halloween M&M’s
Additional mix-ins are easy and fun. Add 1 ½ cups of any of the following ideas:
* Gummy Worms
* Reese’s Pieces
* Skittles
* Twix Mini’s
* Snicker’s Mini’s
* Mini Marshmallows
* Mini Reeses Peanut Butter Cups
* Almonds
* Cashews
* Honey Roasted Nuts
* Chocolate Covered Nuts
* Chocolate Covered Pretzels
Instructions
1. In a large bowl, measure 3 heaping cups of Honey Nut Chex Mix and 2 heaping cups of Bugles and Pretzels and stir to combine.
2. Add Candy Corn, M&M’s, and any other additional mix-ins, and gently stir.
3. Serve in large party bowls or individual bowls or bags.
Hot Dog Snake Bites
Some treats for spooky season have to actually be…spooky. What is spookier than a snake, am I right?! My boys love these rattlesnake hot dog bites, and it’s a quick and easy dinner for me, so I’m a fan. Make them as long as you want, and feel free to put some dipping sauces on the side!
Ingredients
1 (8-ounce) container crescent roll sheets
2 to 3 hot dogs, cut into 7 1 1/2-inch lengths
1/8 of a roasted red bell pepper, cut into a snake tongue
Instructions
1. Preheat oven to 375°F. Line a rimmed baking sheet with parchment paper.
2. Unwrap 1 crescent roll sheet onto a cutting board. Cut, crosswise, two 1-inch strips. Cut strips into seven segments.
3. Wrap segments around hot dogs.
4. Place on prepared baking sheet.
5. Shape a piece of aluminum foil into a cone. Lightly grease. Cut a thin strip of dough and wrap around the foil (this will be the rattler).
6. Place on prepared baking sheet.
7. Bake until golden brown, 10 to 13 minutes.
8. Arrange body segments on a cutting board.
9. Carefully remove the foil from the tail and arrange it at the end of the body.
10. Use a paring knife to create a slit in one rounded end of a hot dog. Insert the bell pepper tongue.
11. Place two small dabs of mustard or ketch on the snake’s head to create eyes—place them at the head of the snake’s body.
Candy Corn Jello Cups
Ingredients
2 3-ounce boxes of lemon Jell-O gelatin
1 6-ounce box of orange Jell-O gelatin
4 cups boiling water
4 cups cold water
1 16-ounce tub of Cool Whip
Optional garnishes: yellow and orange candy sprinkles, candy corn
Instructions
1. Prepare the lemon Jell-O gelatin according to the package directions.
2. Partially fill 8 dessert cups 1/3 of the way up with the yellow liquid gelatin. Refrigerate for 4 hours or until firm.
3. Prepare the orange Jell-O gelatin according to the package directions. Pour the orange gelatin directly on top of the yellow layer. The orange layer can be the same height/thickness as the yellow or slightly higher.
4. Refrigerate the dessert cups for another 4 hours or until firm.
5. Pipe Cool Whip onto the top of each candy corn Jello cup with a pastry bag (or use a quart-size Ziplock freezer bag with a small slit cut in one corner) and a decorating tip, or simply spoon on a generous dollop of Cool Whip on top of these desserts using a tablespoon
6. Garnish the candy corn Jello cups with orange and yellow candy sprinkles or candy corn
Hot Dog Mummies
Treats for spooky season just got spookier! Another play on the hot dog snakes from above: these mummy dogs are another excellent dinner hit. Once you get the hang of wrapping the dough, you can get creative and design the mummies how you like; the more ancient-looking, the better!
Ingredients
1 8-ounce tube crescent dough
8 bun-length hot dogs
1 slice of white American cheese
Ketchup or mustard
Instructions
1. Preheat the oven to 375 degrees F.
2. Line a rimmed baking sheet with parchment paper
3. Open the crescent dough tube and unroll the dough onto a work surface.
4. Pinch together the seams to create a rectangle.
5. Cut the dough lengthwise into 8 long strips.
6. Take 1 hot dog and 1 strip of the dough and wind the dough around the hot dog while pulling gently to stretch the dough. Crisscross the dough so it looks like the mummy wrappings.
7. Near the end of the hot dog, leave a narrow strip of hot dog exposed so you can add eyes after baking.
8. Place the wrapped dog on the prepared baking sheet and repeat with the remaining dough and hot dogs.
9. Bake until golden brown, about 15 minutes.
10. Remove the hot dogs from the oven.
11. Using a toothpick, smear some ketchup or mustard and top with a small piece of cheese to create 2 eyes. Using the same toothpick, put a dab of ketchup or mustard in the center of each eye to create a pupil.
Banana Ghost
These cute ghost bananas take less than 20 minutes to make and are a crowd-pleaser. With only 4 ingredients, this is a great way to get the kids to help!
Ingredients
3 bananas cut in half
3/4 cup melting white chocolate
2 Tbsp coconut oil
Candy eyes or chocolate chips
6 popsicle sticks
Instructions
1. Cut bananas and place on a parchment-lined cookie sheet
2. Insert the popsicle sticks into the middle of the cut end of the banana, about ¾ of the way through.
3. Optional: Put in the freezer for 20 minutes or overnight prior to making these.
4. In a microwave-safe bowl, combine the chocolate and coconut oil and heat in the microwave for 20-30-second increments, stirring occasionally until melted.
5. Spoon the chocolate mixture over the bananas until completely covered and put back on the tray
6. Add your candy eyes (or mini chocolate chips) to the freezer for 10 minutes or until stiff.
Now, with all these great and easy ideas, how excited are you to make these treats for spooky season? If you are trick or treating, throwing a party, or staying home, you can use these recipes as inspiration to sweeten your season.
")

